 Bellingham Siding
 Building New in South Hill Means Building for Bellingham Bay's Weather
South Hill sits up on the hillside south of downtown Bellingham, and that elevation is a mixed blessing. The views over Bellingham Bay are part of what makes the neighborhood desirable, but that same exposure means new homes going up here catch more wind-driven rain and salt-laden air off the water than homes tucked into more sheltered parts of the city. If you're framing a new build or a major addition on South Hill, the window installation is one of the details that decides whether the house stays dry and efficient for the next 30 years or starts showing water stains and soft trim within five.
New-construction window installation is a different job than swapping out an old window in an existing wall. Done right, it happens in coordination with the framer, the weather-resistive barrier, and the siding crew — not as an afterthought bolted in after the fact. We install new-construction windows on homes throughout Bellingham and Whatcom County, and the sequencing and flashing details we use on South Hill jobs are shaped specifically by what this hillside throws at a house.
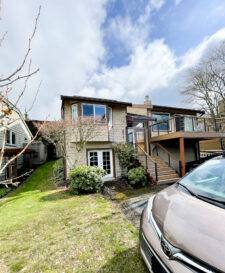
What Whatcom County's Climate Asks of a New Window Opening
Three things drive most of the decisions we make on a South Hill install: salt air, driving rain, and a moss season that runs longer here than almost anywhere else in the state.
Salt Air and Corrosion
Proximity to Bellingham Bay means airborne salt reaches hardware, fasteners, and unprotected metal faster than it would inland. On new construction we're careful about which fasteners and flashing metals go into the rough opening — mixing incompatible metals (for example, the wrong flashing against aluminum trim) sets up galvanic corrosion that can eat away at hardware and flashing over time, often years before anyone notices from the outside.
Driving Rain
Wind off the bay doesn't just fall on South Hill homes, it drives sideways into wall assemblies, especially at elevation and on exposed elevations. A window that's caulked in but not properly flashed will hold up fine in a light shower and fail during the first real winter storm, when wind pressure pushes water past the trim and into the wall cavity. New construction gives us the chance to build the drainage path correctly from the studs out, which is the only real defense against wind-driven rain.
Moss and Prolonged Dampness
Whatcom County's moss season is long — mild temperatures and near-constant moisture from fall through spring keep organic growth active for months longer than in drier climates. Moss and algae don't just sit on the surface; they hold moisture against sills, trim, and cladding, which accelerates rot in any wood component and keeps vinyl and fiber cement surfaces perpetually damp. Window selection and sill detailing on a new build should assume this dampness is the normal condition, not the exception.
New Construction vs. Replacement: Why the Method Matters
New-construction windows are built with a nailing flange around the perimeter of the frame. That flange gets integrated directly into the weather-resistive barrier (WRB) and flashing system before the siding goes on — it's a fundamentally different, and more thorough, water-management approach than a replacement or pocket install, which has to work within an existing, already-clad wall.
On a South Hill new build, this is an advantage we lean on hard. We're not working around existing trim or trying to seal into a wall that's already finished — we're building the drainage plane from scratch, which means every layer can be sequenced correctly the first time.
What a Correct New-Construction Window Installation Involves
A window that "looks right" from the street can still be installed wrong. The parts that actually keep water out are the ones you can't see once the siding goes up. On every South Hill install we follow the same sequence:
- Sill pan flashing installed at the base of the rough opening, sloped to drain any water that gets past the window back out to the exterior, not into the wall.
- Back-dam or end-dam details at the sill pan corners so water can't migrate sideways into the framing.
- Jamb and head flashing integrated with the WRB in the correct shingle-lap order — each layer overlapping the one below it, so water always sheds downward and outward.
- Window set into the opening, checked for level, plumb, and square before a single fastener goes in permanently.
- Nailing flange fastened per the manufacturer's schedule — enough fasteners to meet wind-load requirements without over-driving and distorting the frame.
- Head flashing with an end dam or drip cap above the window to break the water path before it reaches the top of the frame.
- Interior and exterior sealant placed only where it belongs — sealing the interior air barrier while leaving the exterior weep path clear so any incidental water can still drain out.
Skip or rush any one of these steps and the window can still pass a casual visual inspection while setting up a slow leak that won't show itself for a year or two — usually as staining, a soft spot in interior trim, or a musty smell that shows up first during Whatcom County's wettest months.
Choosing Window Materials for a Bay-Exposed Site
Frame material matters more on an exposed hillside lot than it does in a sheltered inland yard. Here's how the common options hold up under South Hill's combination of salt air, driving rain, and near-constant seasonal dampness:
| Frame Material | Moisture & Salt Air Resistance | Maintenance | Typical Fit for South Hill |
|---|---|---|---|
| Vinyl | Good — won't rot or corrode, but can warp under sustained direct sun/heat exposure | Low — occasional cleaning | Solid, budget-friendly choice for most elevations |
| Fiberglass | Excellent — dimensionally stable, resists moisture and salt exposure well | Low | Strong option for the most wind- and rain-exposed elevations |
| Aluminum-clad wood | Good exterior protection, but any breach in the cladding exposes wood beneath to rot risk | Moderate — cladding seams need periodic inspection | Works well when detailing and flashing are precise |
| Bare wood | Poor in this exposure without diligent upkeep — highest rot risk in a long moss season | High — regular refinishing required | Only recommended where architectural style requires it, with a clear maintenance plan |
We'll talk through these trade-offs with you based on which elevation of the house is taking the brunt of the weather — a bay-facing wall on an elevated South Hill lot is a different exposure problem than a sheltered north wall on the same house.
How We Sequence the Work on a New Build
Window installation on new construction isn't a standalone task — it has to slot into the framing and siding schedule correctly, or the water-management details above don't hold together. Our general sequence on South Hill projects:
- Confirm rough openings are framed square, plumb, and to the correct dimensions before windows arrive on site.
- Install or verify the WRB is lapped correctly around each opening before flashing begins.
- Install sill pan flashing and back-dams at every opening.
- Set and fasten each window, checking level and operation before final fastening.
- Complete jamb and head flashing, integrated into the WRB shingle-lap sequence.
- Coordinate with the siding crew (ours or the builder's) so cladding laps over the flashing correctly rather than butting against it.
- Walk every opening before it's covered by siding or trim — this is the last point where a flashing mistake can be caught and fixed cheaply.
That last step is the one most often skipped on production builds where trades are moving fast to hit a schedule. We build it into the process because on an exposed South Hill lot, a flashing error caught before the siding closes it in is a five-minute fix; caught two years later, it's a wall repair.
Why Local Experience on South Hill Specifically Matters
A window crew that mostly works sheltered, inland neighborhoods can do fine work there and still get caught out by a South Hill lot's wind exposure and elevation. Knowing which elevations on a given hillside lot take the worst of the driving rain, how much additional flashing overlap to build in on the bay-facing side, and how long moss and moisture will sit on a given surface each winter isn't something you get from a spec sheet — it's something you learn from doing the work on this hillside, in this weather, repeatedly.
We also coordinate directly with builders and general contractors on new-construction timelines, since window installation has to happen at a specific point in the framing sequence — not too early, not after the siding crew is already staging material. Working South Hill regularly means we already know how to slot into that schedule without becoming the bottleneck.
A Homeowner or Builder's Pre-Install Checklist
If you're managing a new build yourself or want to know what to confirm with your window crew before the walls close in, ask about these points:
- Are sill pans and back-dams being installed at every rough opening, not just the most exposed ones?
- Is the WRB lapped in the correct shingle order around each window before flashing goes on?
- What fastener and flashing metals are being used, and are they compatible with each other to avoid corrosion?
- Will someone walk and inspect the flashing at every opening before siding covers it?
- Does the window's U-factor and SHGC rating meet Washington's current energy code for this climate zone?
- Is there a clear plan for which elevations get extra weather protection given the lot's wind exposure?
Any window contractor working in this climate should be able to answer these without hesitation. If you get vague answers, that's worth a second opinion before the siding goes on and covers the evidence either way.
Maintenance After Move-In
Even a correctly installed new-construction window benefits from a little seasonal attention on a South Hill lot. Rinse salt residue off frames and glass periodically, especially on bay-facing elevations. Keep gutters and downspouts clear so roof water isn't dumping extra volume onto window heads below. And during the wetter months, a quick visual check of sills and trim for early moss growth or soft spots lets you catch anything small before it becomes a repair.
If you're planning a new build, addition, or major remodel on South Hill and want windows installed with this hillside's weather actually accounted for, we're happy to walk the plans with you and put together a free, no-pressure estimate — just fill out the form below.